
Get Started at Ubuntu with DeepSeek Harness on a Low-Cost Setup
This article addresses the high cost of GPT‑6/Codex development requiring expensive Macs, and offers an alternative: a used PC from Akihabara with Ubuntu and DeepSeek Harness. It provides step-by-step installation instructions, recommended plugins, and future outlook for affordable AI programming (Vibe Coding).

Foreword: AI Development Barriers Are Rising – A Call for Democratization
OpenAI’s GPT-6 has been making waves lately, but it’s so popular that I haven’t had a chance to try it myself. While waiting, I ended up digging into a more niche topic.
Right now, if you really want to make the most of GPT‑6, you have to use Codex—that is, the current ChatGPT Desktop. And to use Codex comfortably, you’ll need a Mac, specifically one with an Apple silicon chip.
So why not Windows? Simply because Mac offers the best implementation of Computer User and Sandbox. On Windows, if you have the Home edition, many features are crippled; even with Pro, unless you tweak it extensively, a lot of functionality remains unavailable.
This raises a clear problem: the overall cost of entry is too high. For students who actually want to get into the field, or for working people in other industries who find IT interesting, the barrier is steep. Asking an average worker to spend ¥200,000–¥300,000 (or more) on a computer for themselves or their kids is just not realistic, and I think that’s a shame. Looking back, I started programming myself in middle and high school, so I really understand that feeling.
To promote technological democratization in the AI era as much as possible, I turned to DeepSeek Harness, which recently emerged from China. With a used PC bought in Akihabara for as little as ¥7,000–¥8,000 (or under ¥20,000), you can install Ubuntu, set up DeepSeek Harness, and start experiencing and learning AI programming (Vibe Coding). What follows is pure hands-on guidance – not too long, and I hope it proves useful.
Installing DeepSeek Harness on Ubuntu – Step‑by‑Step
1. Update the system and install the most basic tools
sudo apt update
sudo apt install -y git
sudo apt install -y curl
2. Install nvm – the Node.js version switcher
- You might ask: why not install Node.js directly? Because future Node.js version changes could suddenly break DeepSeek Harness. By installing a version manager upfront, we prepare for that possibility.
curl -o- https://raw.githubusercontent.com/nvm-sh/nvm/v0.40.7/install.sh | bash
source ~/.bashrc
nvm --version
nvm install --lts
nvm list
3. Install DeepSeek Harness
npm install -g @deepseek-ai/dsh
npm install -g pnpm
2. Install the Visual Plugin Marketplace for DeepSeek Harness
dsh plugin --profile web add dshmarket3. Launch DeepSeek Harness, purchase an API, and start using it
dsh webFor API purchase and usage details, refer to this article: https://www.vibecodingjapan.com/blog/1786990361210#article-heading-7
4. Recommended Plugins in order of importance
In the bottom‑left corner, click Settings, and you’ll see the Plugin Marketplace – search and install plugins easily from there.
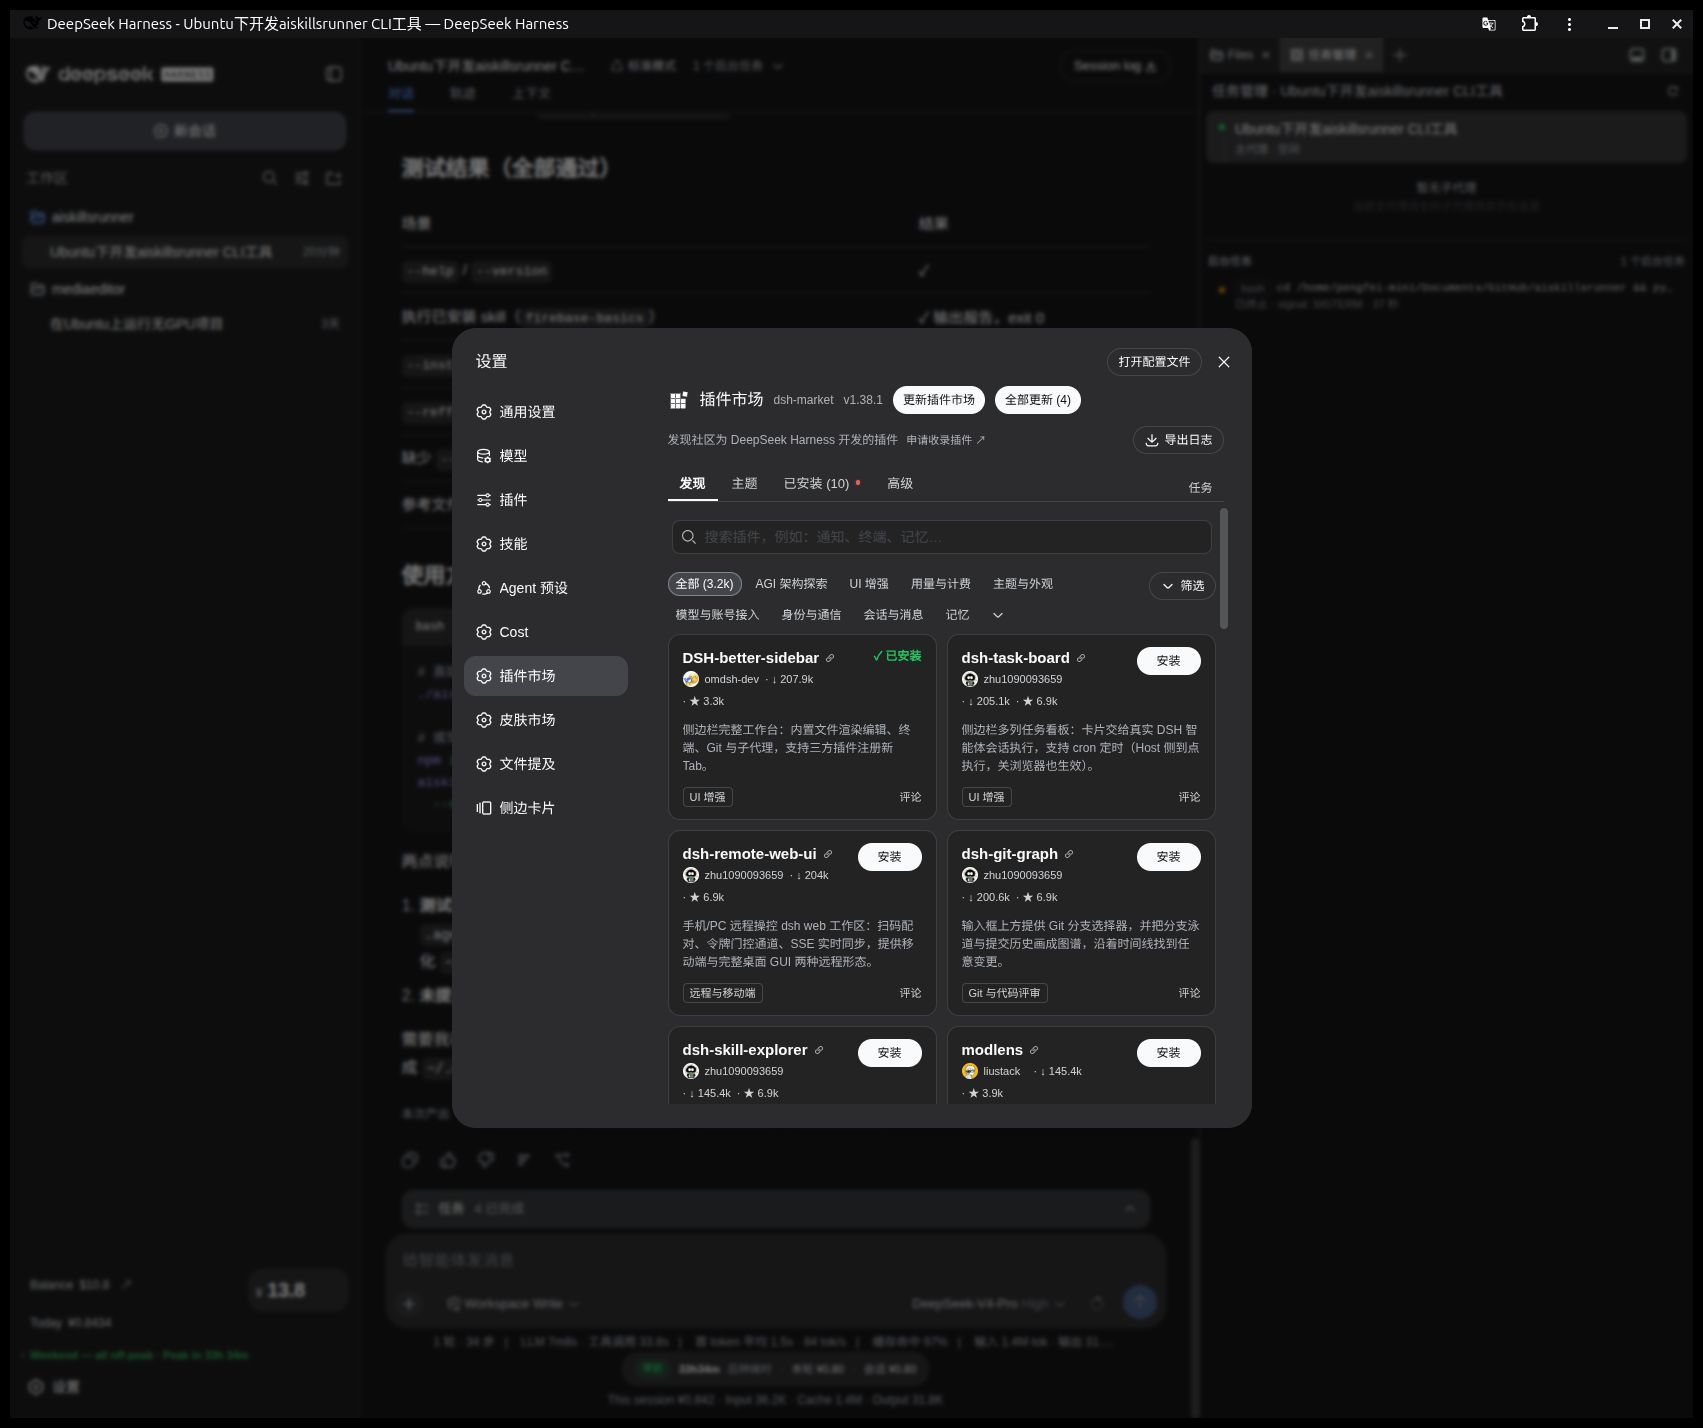
dsh-find-plugin
Find plugins without leaving the agent: search this curated plugin library by keyword or category, and get one‑click installation commands.
dsh-at-file
Codex‑style @file references: search workspace files in the editor and append their content to your prompt.
dsh-context
DSH Context Insight Panel: context dashboard + /context command + context browser – offering all‑in‑one context lifecycle management, including composition, content details, evolution trends, compression/injection events, and statistics.
@kenz1117/dsh-ui-usage-billing
Sidebar billing dashboard: aggregates actual usage from session logs (calls/tokens/cache counts per model and per day), estimates RMB costs based on the current multi‑vendor price catalogue, exempts subscription plans (code/token/agent) from billing, and displays health status indicators for each vendor.
@linxin666/dsh-client-ui-skill-explorer
DSH Web UI Skill Center: browse all loaded skills (grouped by source), enable or disable model calls, create new skills, and move deleted skills to a recoverable trash bin.
@linxin666/dsh-client-ui-task-board
DSH Web UI Task Board: a multi‑column sidebar board where task cards run in real DSH agent sessions, supporting cron‑based scheduling – tasks continue executing on the host even after you close the browser.
@linxin666/dsh-client-ui-git-graph
DSH Web UI Git branch selector and Git graph: switch branches from the session header, and explore branch swimlanes and commit history.
dsh-better-sidebar
A full‑featured sidebar workbench with file rendering and editing, terminal, Git, and sub‑agents; third‑party plugins can register new tabs.
Future Outlook
First and foremost, with this setup you can experience AI development (Vibe Coding) on par with Codex GPT‑5.6, all on an affordable machine.
If you want to build web pages, tools, or software, the Flash tier is plenty – cheap, fast, and good enough for most tasks.
If you’re tackling something particularly challenging – like modifying an operating system, or starting a massive project from scratch – then go with the Pro mode. It costs a bit more, but its reasoning steps are more accurate and fewer in number. For very ambitious visions, it might even end up cheaper than Flash in the long run.
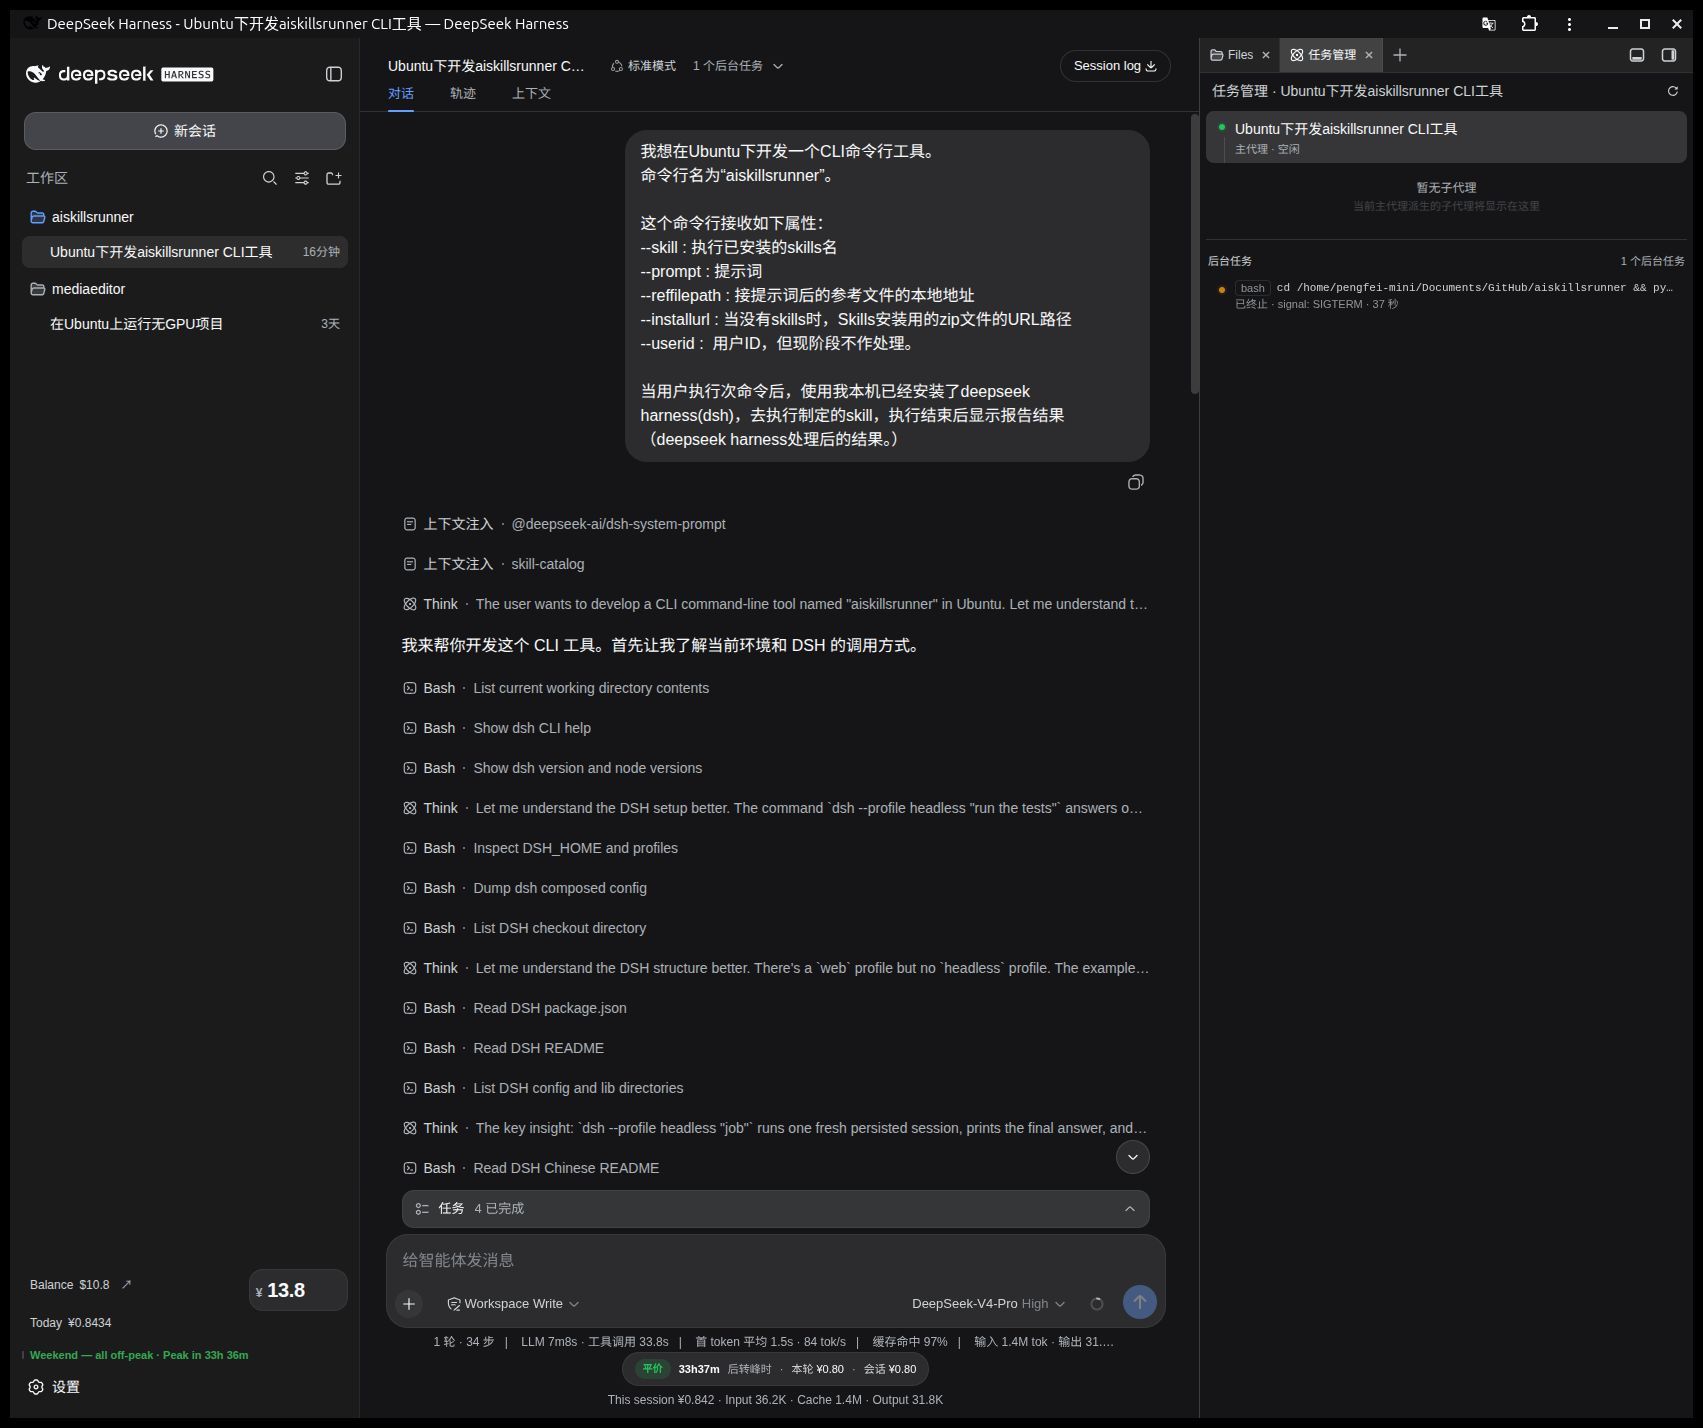
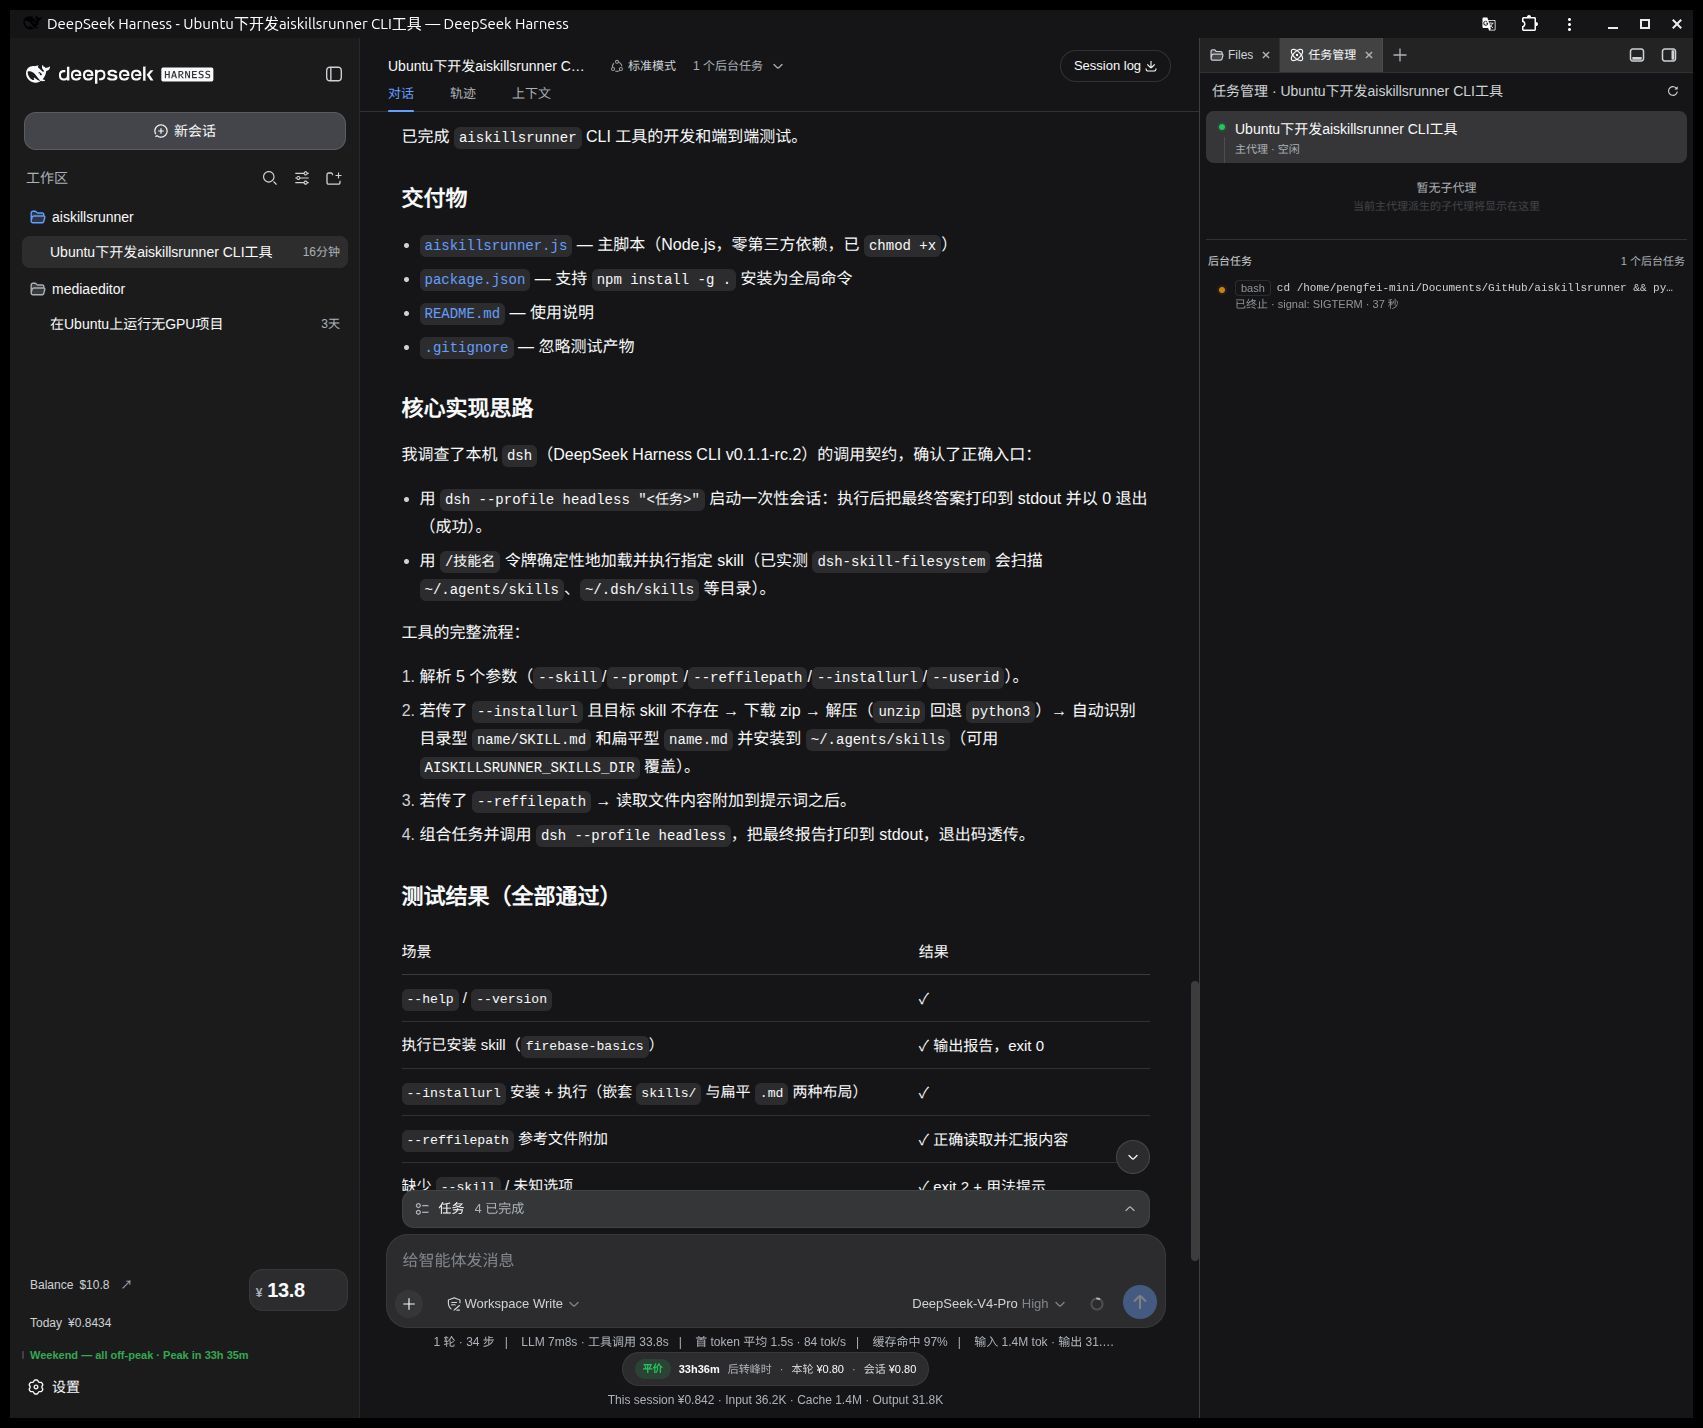
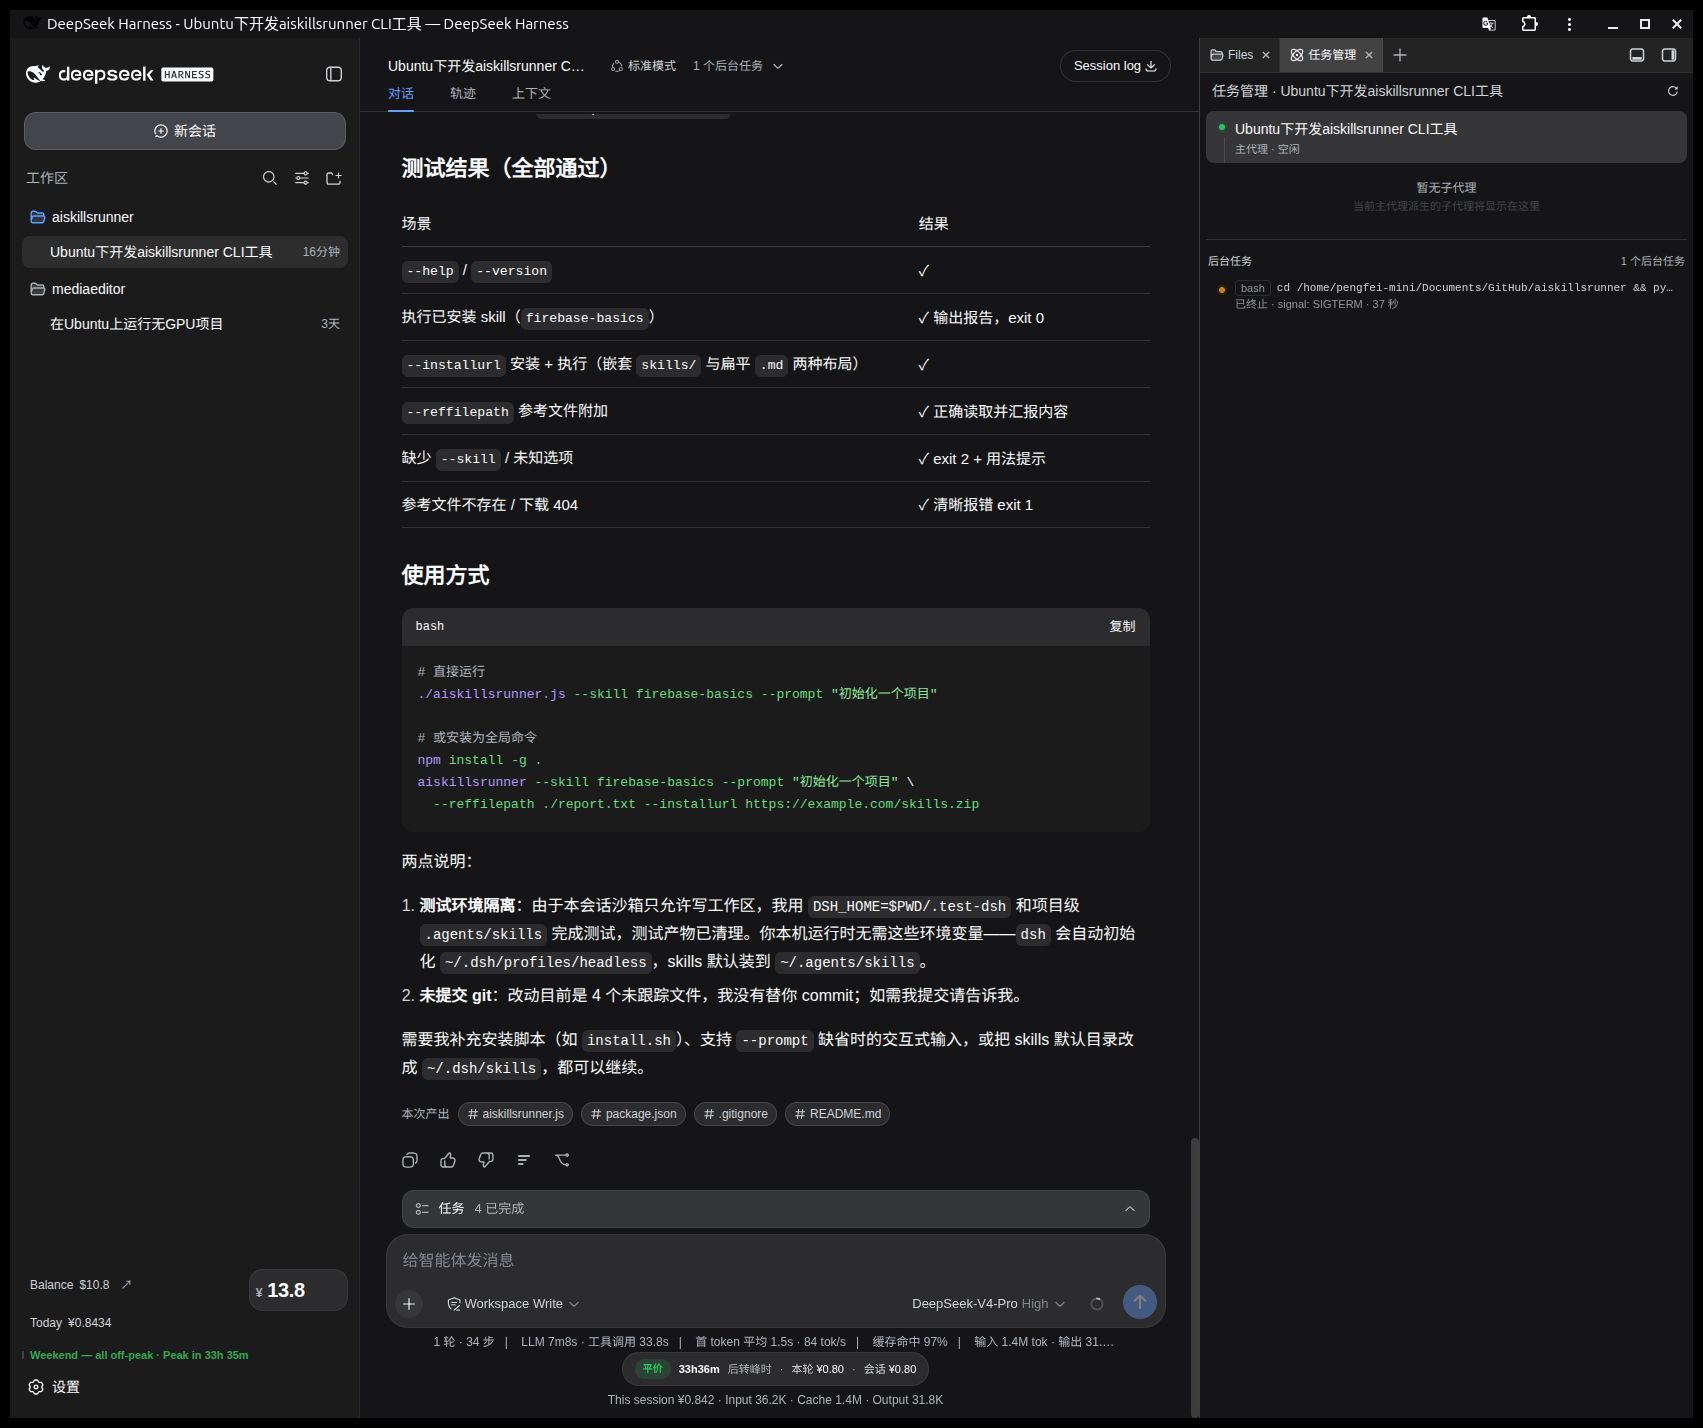
For example, I’m currently working on a command‑line tool under Ubuntu. This tool accepts arguments, launches a preset DeepSeek Harness instance, instructs it to process tasks using specified Skills, and returns the results. It’s like building a “crayfish system” of my own. If I succeed, I’ll have created an agent tool comparable to those sold for millions of yen – that would be amazing!
The screenshot below was generated with Pro mode , costing only $0.12 . Regardless, the fact that it produced something is already impressive. I’m too sleepy right now to test the actual output, but I’ll do that tomorrow or the day after. If it works flawlessly on the first try, it’ll be truly incredible. Looking forward to it!
追記:バージョン更新の方法
- Check current version:
dsh --version- Check the latest official version:
npm view @deepseek-ai/dsh version- Update to the latest version:
npm install -g @deepseek-ai/dsh追記2:Gethub SSH
ssh-keygen -t ed25519 -C "your@email.com"
eval "$(ssh-agent -s)"
ssh-add ~/.ssh/id_ed25519
cat ~/.ssh/id_ed25519.pub